


When one gets started with snapshot testing, there are not enough resources to learn from. It's no surprise to end up with snapshot tests causing a lot of headaches rather than helping improve the quality of our app. One should not snapshot test without criteria, one must have a strategy.
That's why, in this blog post, we'll decipher step by step:
- What views to snapshot test and why
- How to write snapshot tests to catch hard-to-find visual bugs (with code samples).
For that, we'll use the screen below as an example:

It is a RecyclerView, which is one of the most widely used UI components in the Android world.
1. Start small and simple
So your first impulse is to fully snapshot test the Activity or Fragment containing the RecyclerView at once. Although that is a valid approach, I strongly recommend to go for a view-by-view strategy instead. But why?
Troubles while snapshot testing a screen
Snapshot testing an Activity or Fragment usually requires more work than it seems. Some problems you might face are, namely:
- Deal with asynchronicity. Chances are high that you need to fetch data in the Activity or Fragment before binding it to its views. In this case, you also need some synchronisation mechanism (or to mock the network layer) to take the snapshot only once all views are ready. This involves more work. However, by using a view-by-view approach, we can skip data fetching and directly bind our views with mock data.
- Choosing "screen states" that are worth testing. Every view part of the screen has its own states. The screen state is likely represented by all the state combinations of those views. The more views, the more screen states that are possible. The more screen states, the harder to identify those worth testing. But it also becomes easier to forget those that are important accidentally. With a view-by-view testing strategy, you keep the focus on testing all relevant states of a single view.
- More views, more prone to flakiness. Unfortunately, snapshot tests are not exempt from flakiness. The more views you are testing at once, the higher the chance to encounter some issues. Identifying the source(s) of flakiness becomes harder too. The smaller the scope - i.e. single view vs. full screen -, the easier to find the issue. I will explain how to get rid of most of these issues in the upcoming blog posts of this series.
Thus, I suggest to start testing view-by-view. The idea is simple: divide the problem into smaller chunks. If that is not enough, then go ahead and complement it with full screen snapshot testing.
Deciding what to test
RecyclerViews render view units called ViewHolders. This simplifies the view-by-view testing strategy a lot: each ViewHolder is a snapshot testing unit.
So we decide to snapshot the following ViewHolders in the screen under test
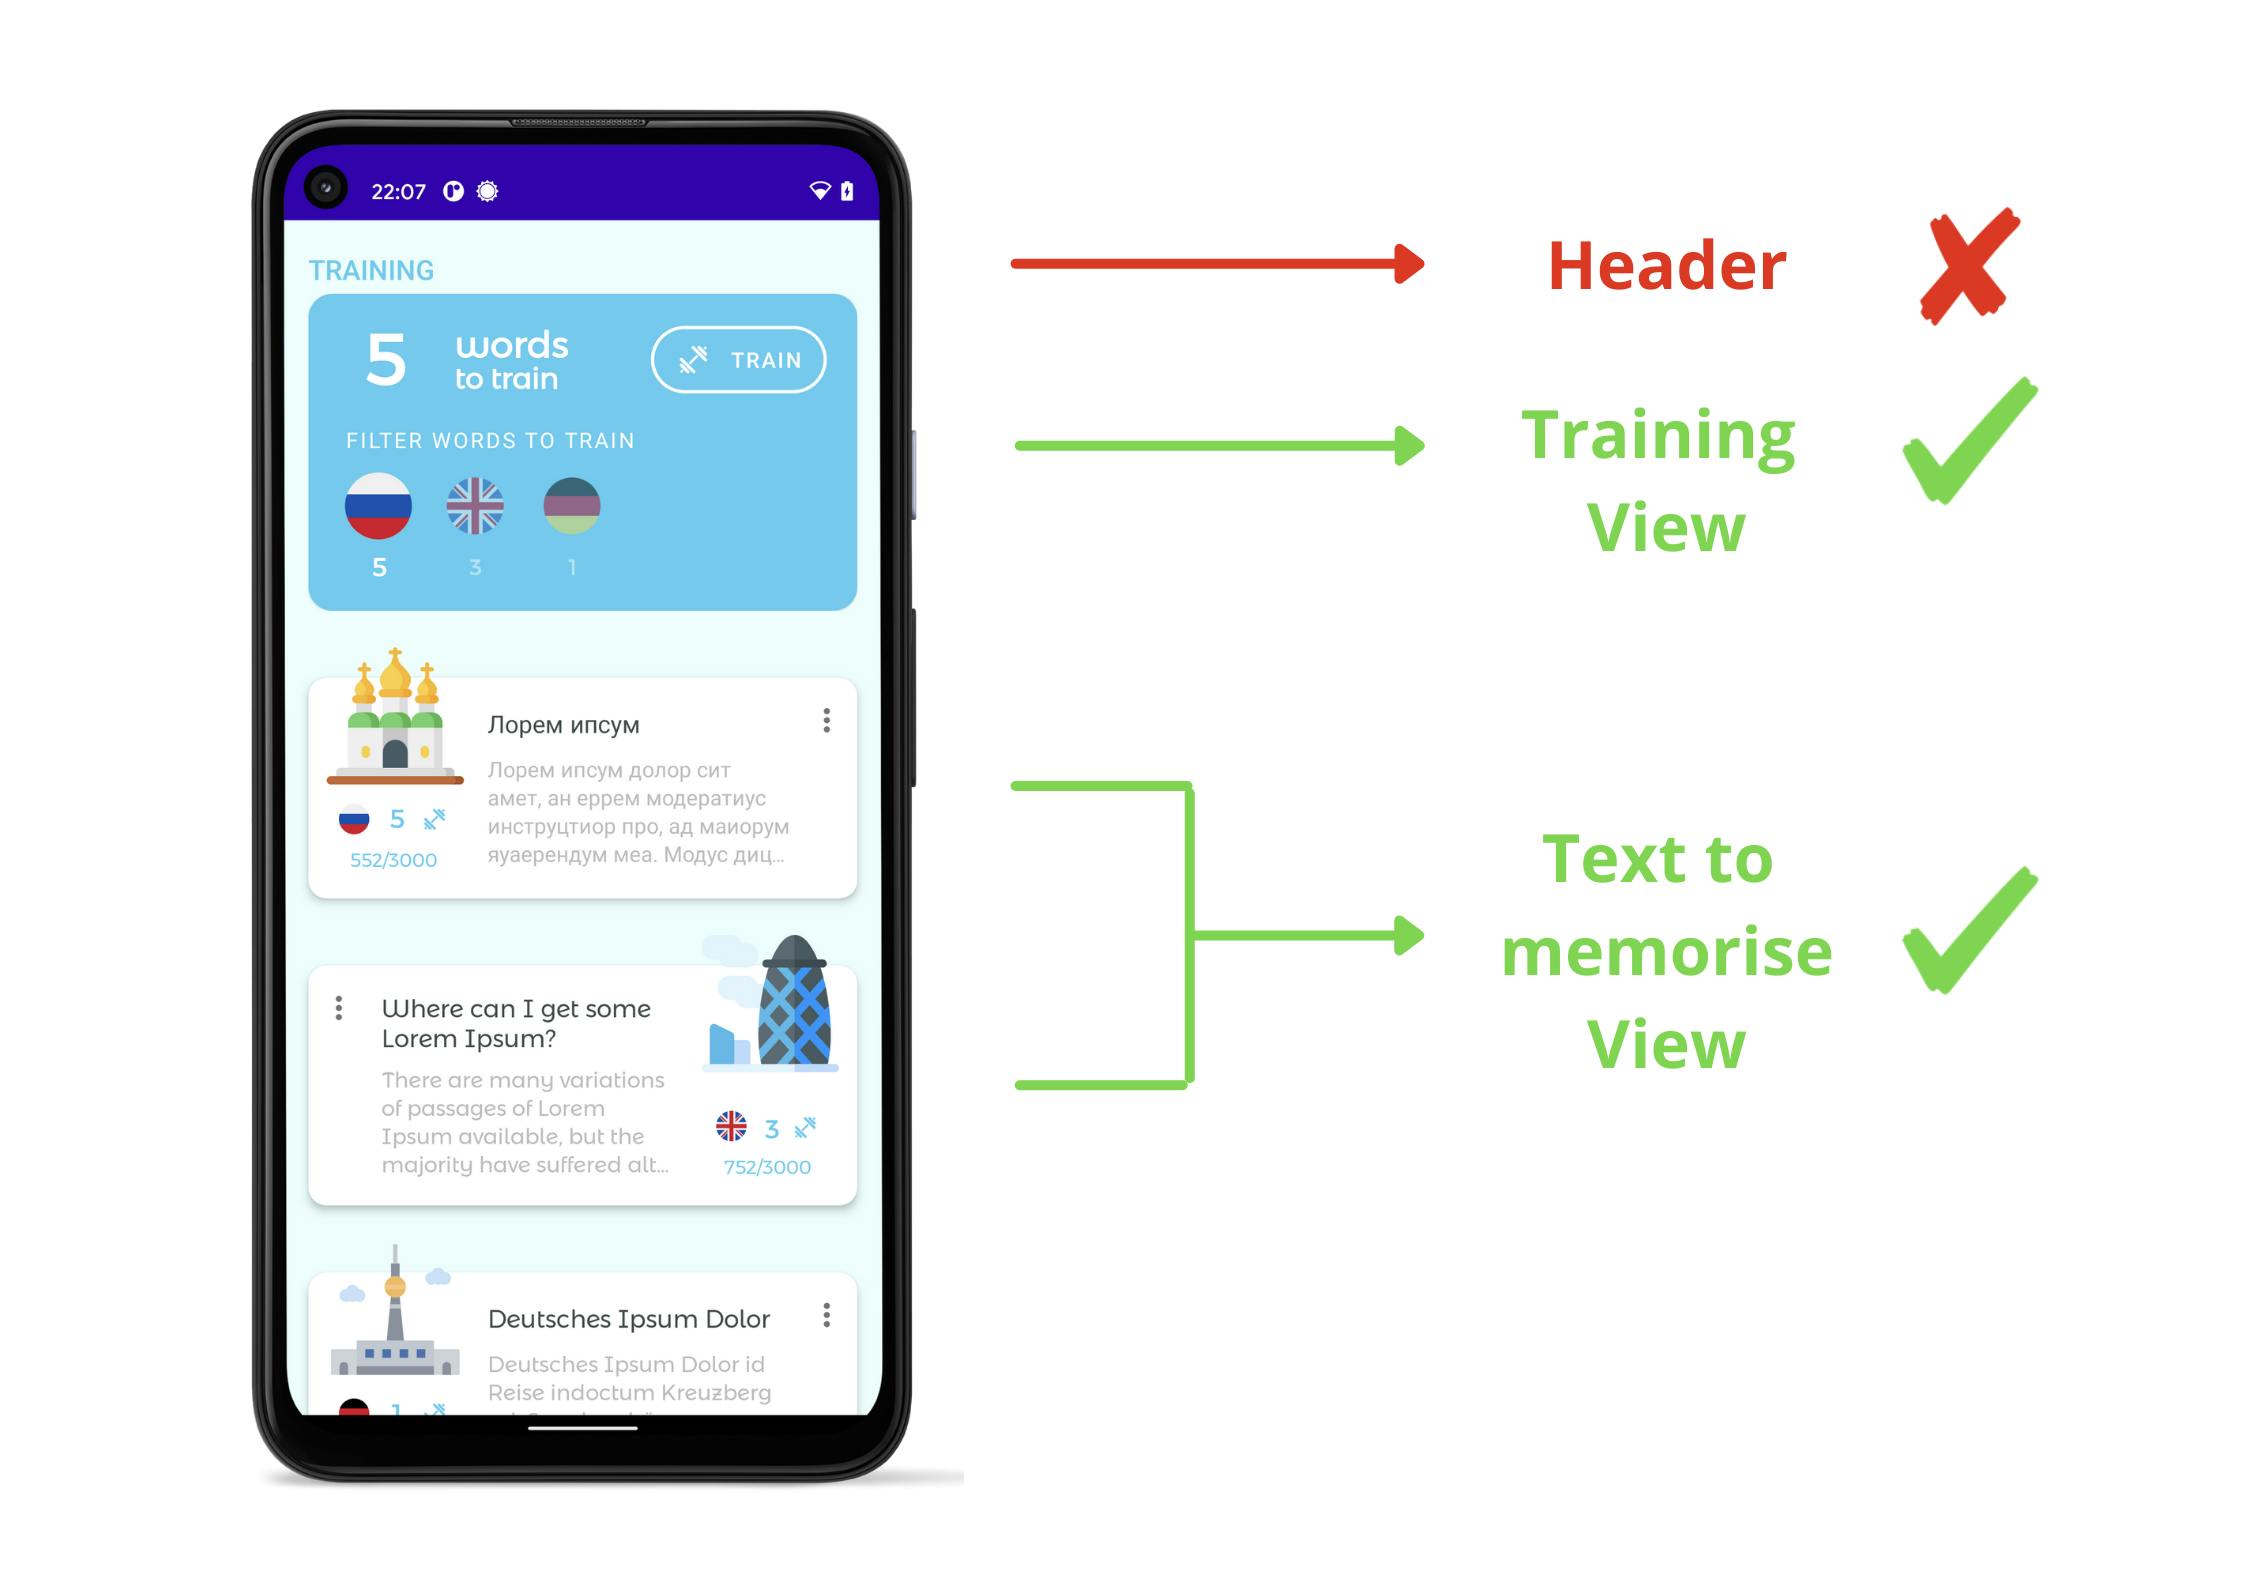
Observe that we have excluded the header. At this stage, one should also evaluate what is worth testing and what is not. Ask yourself: If I write a test for this view, what's the value it brings?
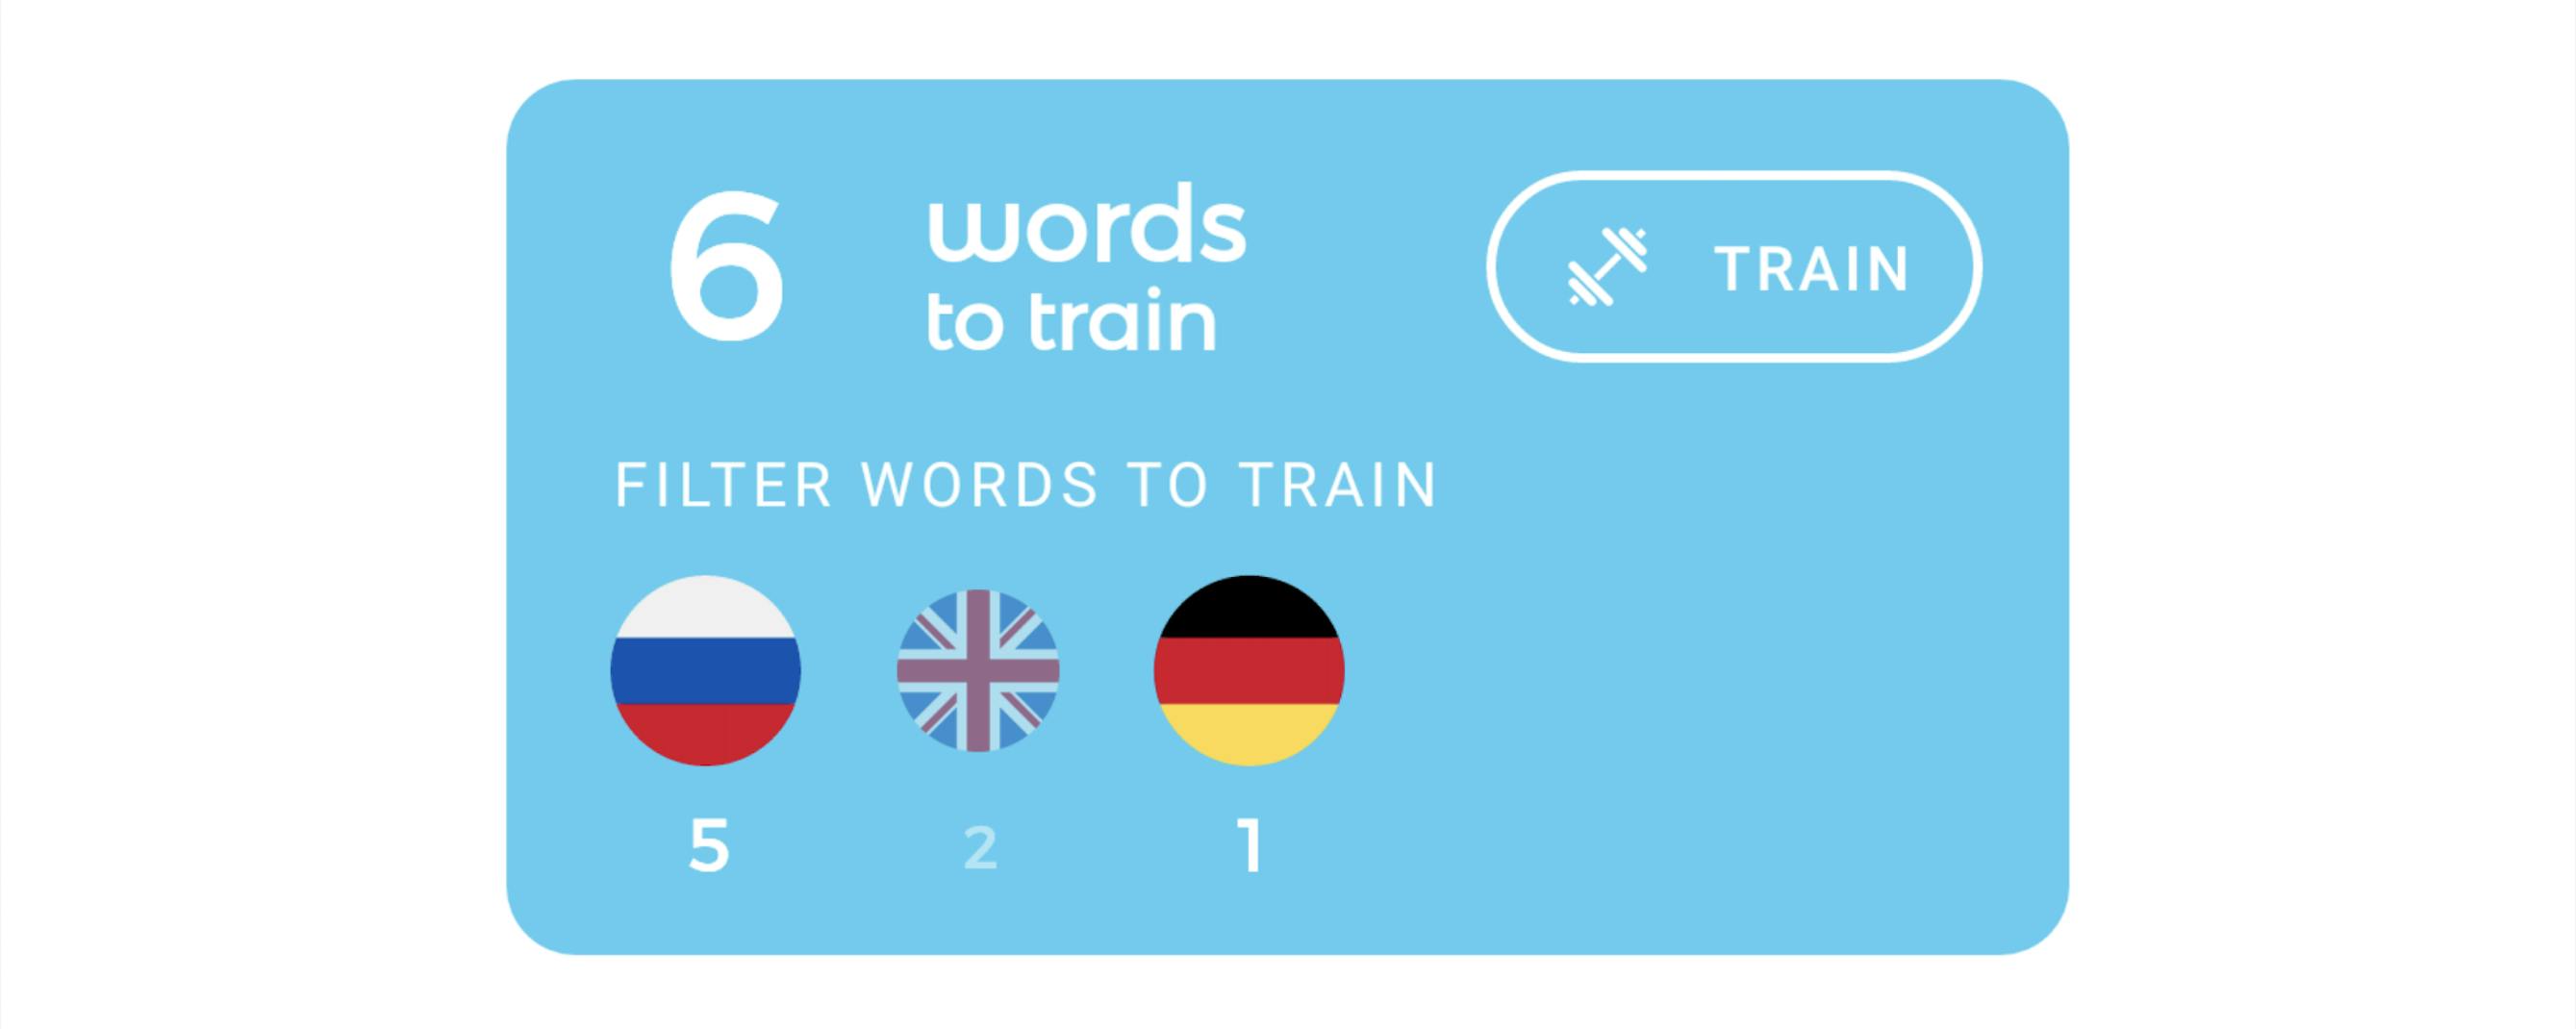
Now think about the different states that each of these views can reflect. For the sake of simplification, we'll take the Training View above as an example for the rest of this blog post. The Training View can represent 2 states:
With words to train
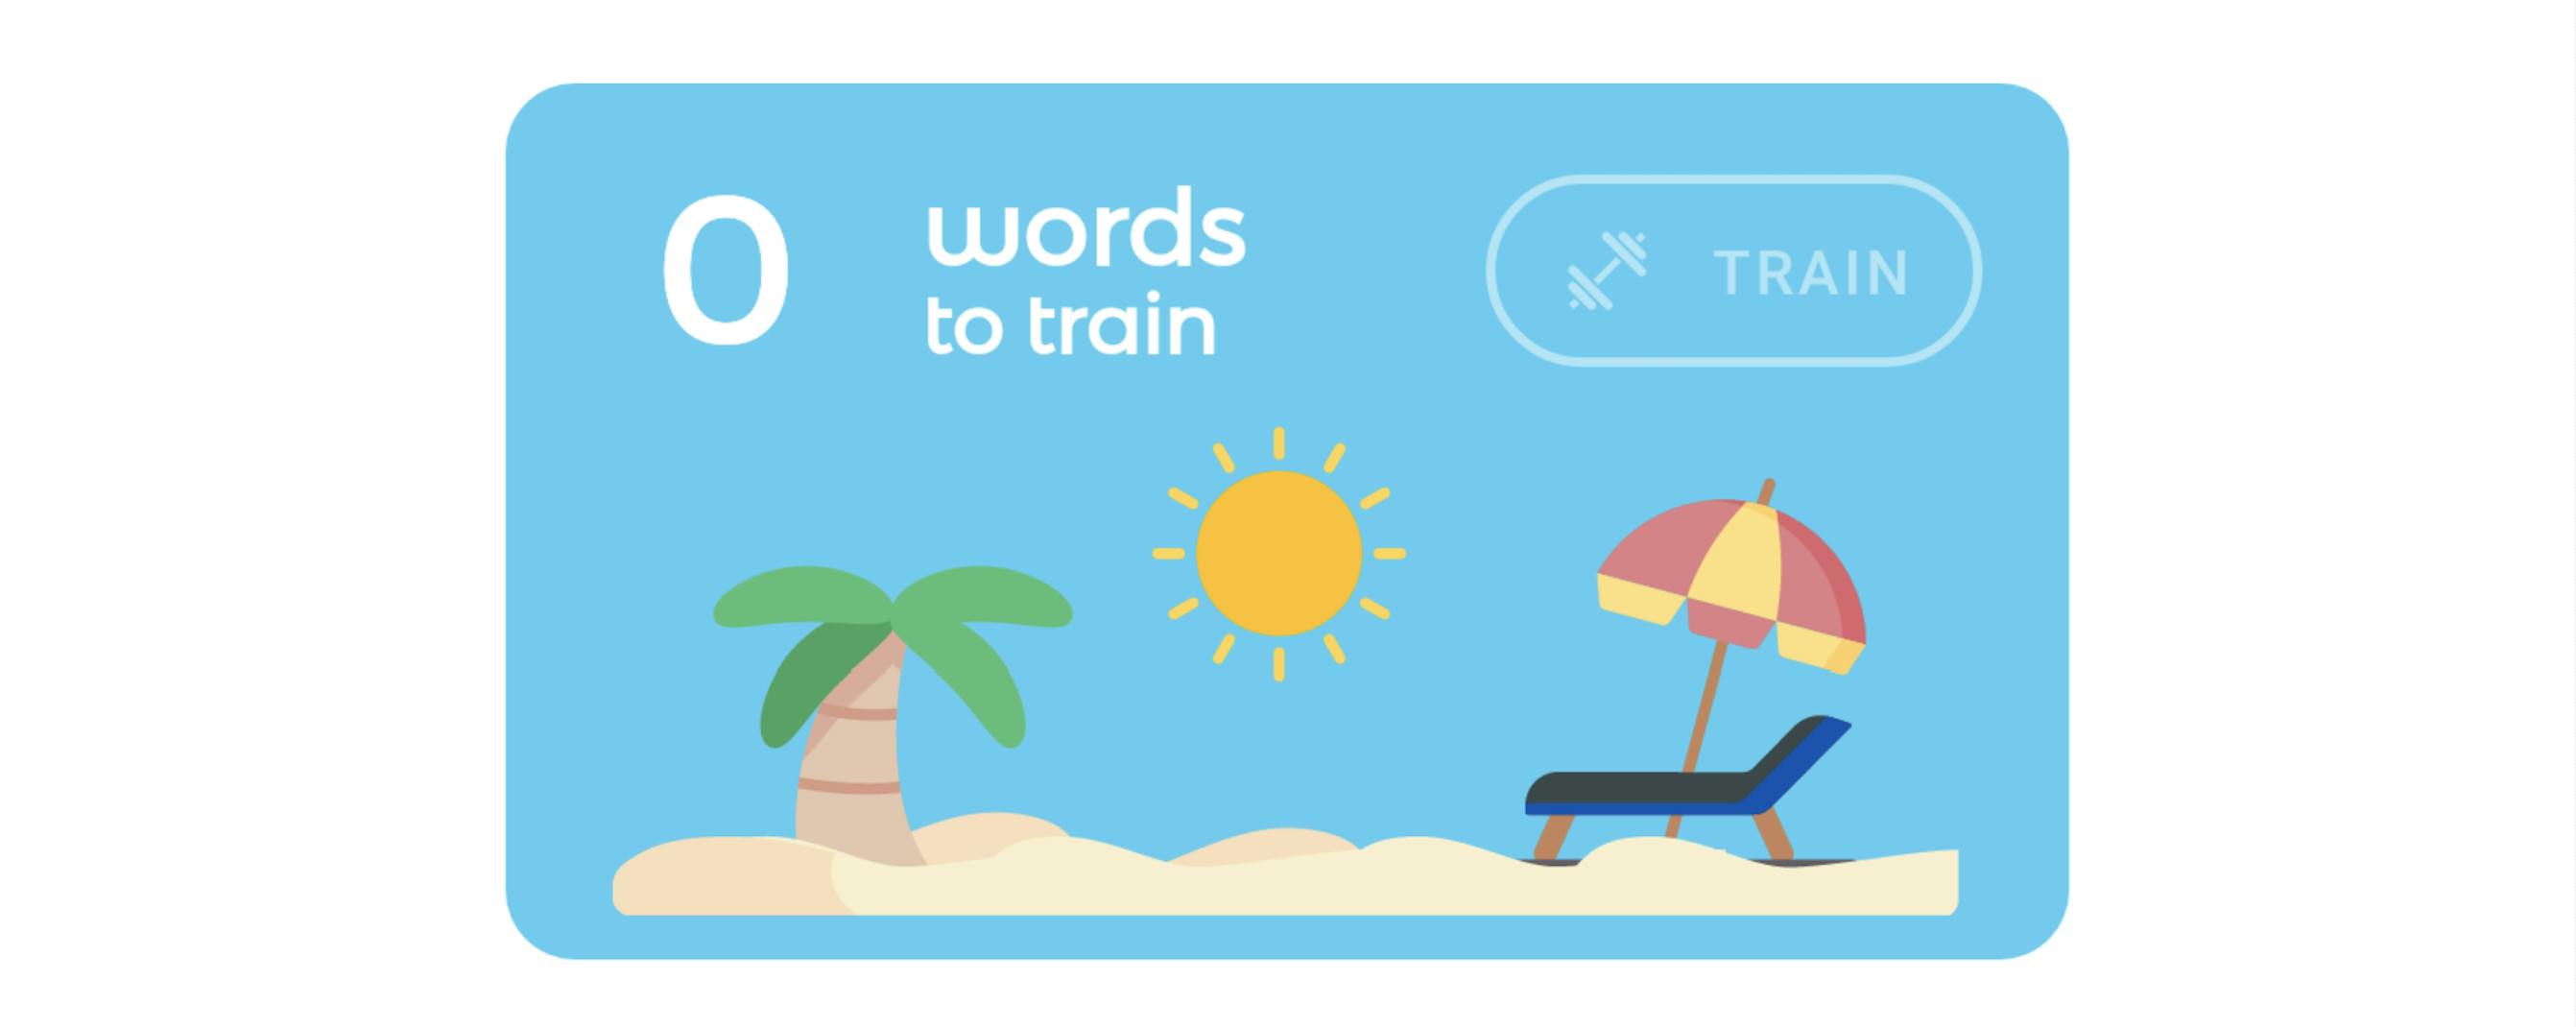
Without words to train
Once we have recognised all the relevant states of the view under test, we are ready to hunt its bugs!
2. Aim to break the layout
Developers tend to manually test or write tests that cover the standard user behaviour, the user's happy path (see the 2 pictures above). Nevertheless, that does not hold true for "unhappy paths". Same happens with designers very often. And that's where snapshot tests excel at: finding design flaws
Identifying unhappy paths
As a general tip, I recommend to identify unhappy paths by, at the very least and if applicable, seeing what happens when:
- The view under test is narrower/wider than expected
- Text is longer/shorter than expected
- View visibility changes
- Dark mode (or any other theme)
- Adding a large amount of views to a ViewGroup
In doing so, we want to ensure that:
- The view does not contain ellipsized/text cut (1 & 2)
- There is no view overlapping (1, 2, 3 & 5)
- The UI elements display in the desired colour (4)
- All views are fully displayed inside a ViewGroup (5).
In the view under test 1, 2 & 5 are applicable to the state with words to train. We can achieve it by providing:
- View width
- Huge system font size
- Thousands of words to train
- Words to train for all the supported languages
Now we need to mock this data and bind it to our Training View.
Preparing the mock data
The Training View renders a TrainingItem containing a map of languages with its corresponding translations and a set of active languages.
When taking view width, system font size and snapshot meta data into consideration, our mock data container would look as follows:
data class TrainingTestItem (
   viewWidth: ViewWidth,
   fontsize: FontScale,
   trainingInfo: TrainingItem,
   snapshotId: String
)
At this point, we already know all the variables we'd like to verify. We can use this very same data class for happy and unhappy paths. I'll skip the happy path code for the matter of brevity.
An unhappy path TrainingTestItem would look like this
object TrainingTestItemObjectMother {
   fun withWordsToTrainUnhappyPath() =
      TrainingTestItem(
         viewWidth = ViewWidth.NARROW,
         fontsize = FontScale.HUGE,
         trainingInfo = TrainingItem(
            trainingByLang = wordsToTrainPerLang(999_999),
            activeLangs = Language.values().toSet()
         ),
         snapshotId = "WITH_WORDS_TO_TRAIN_UNHAPPY_PATH"
      )
}
Our mock data is ready, time to write the snapshot test itself!
Writing the snapshot tests
In this blog post, we are going to use pedrovgs/Shot for writing snapshot tests. I'll skip how to configure Shot since it is described in detail in the repo. Shot provides, among other features, handy compareScreenshot(target) methods to snapshot test Activities, Fragments, Dialogs, Composables, Views etc. and even ViewHolders among them.
It suffices to inflate a xml layout to get a View to snapshot test. Also consider to use
<include>inside large xml layouts to facilitate view-by-view snapshot testing. Then bind the data by callingsetText(text),setImageRes(imgRes), etc. on its respective views. Such tests cover less code, but also help find visual bugs.
Every snapshot test has the following structure:
- Launch an
ActivityScenario. This is important, since all the views inflated with the context of this activity will be styled accordingly! For font size change support, take a look atFontsizeActivityScenario - Inflate the view and bind the data e.g. TrainingTestItem in this case. This must happen in the UI thread to avoid exceptions.
- Wait for Ui thread to be idle
- Record/Verify the screenshot.
We cover 2 & 3 with an extension method.
fun <V>ScreenshotTest.waitForView(actionToDo: () -> V): V =
    getInstrumentation().run {
        var view: V? = null
        runOnMainSync { view = actionToDo() }
        waitForIdleSync()
        return view!!
    }
Now we are ready to write the test
private fun ScreenshotTest.snapViewHolder(testItem: TrainingTestItem) {
    val activity =
       FontsizeActivityScenario.launchWith(testItem.fontScale)
          .waitForActivity()

    val view = waitForView {
       val layout = activity.inflate(R.layout.training_row)
       TrainingViewHolder(layout).apply {
          bind(
             trainingItem = testItem.trainingItem,
             languageClickedListener = null
          )
       }
    }

    compareScreenshot(
       holder = view,
       heightInPx = 600,
       widthInPx = testItem.viewWidth.widthInPx
       name = testItem.snapshotId
    )
}
@RunWith(Parameterized::class)
class TrainingItemUnhappyPath(
     private val testItem: TrainingTestItem
) : ScreenshotTest {

     companion object {
        @JvmStatic
        @Parameterized.Parameters
        fun testData(): Array<TrainingTestItem> =
           arrayOf(
              withWordsToTrainUnhappyPath()
              withoutWordsToTrainUnhappyPath(ViewWidth.NARROW)
              withoutWordsToTrainUnhappyPath(ViewWidth.WIDE)
           )
     }

     @Test
     fun snapViewHolder() {
        snapViewHolder(testItem)
     }
}
Warning: make sure you've successfully disabled the animations on the device/emulator running the snapshot tests!
If we record the tests, the generated snapshot files for each state look like this
With words to train

Without words to train

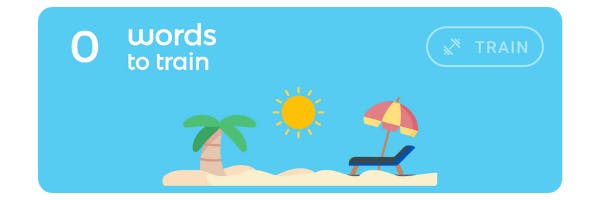
We have found out that our view clearly breaks when testing some unhappy paths!
Conclusions
Due to the lack of resources on snapshot testing, it is hard to understand how to get the most out of them. In this blog post we have seen how to come up with an effective snapshot testing strategy:
- Start small & simple: Prefer to snapshot test several small views to a full screen.
- Aim to break the layout: Do not settle for happy paths. Strive to find unhappy paths that can catch unusual visual bugs and snapshot test them.
In the next article, I will enumerate some of the most common sources of flakiness you might come across and how to overcome them.
Repository with code samples and other links
- The repo used for this series here, including the example used in this article. I'll include more samples there!
- library to change the font size in instrumentation tests: FontSizeTestRule and FontSizeActivityScenario
This article was part of my talk "An Introduction to Effective Snapshot Testing on Android" at
I hope you enjoyed it. Do not forget to star the repository or subscribe to this blog to stay tuned!
Special thanks to Pablo Gallego for reviewing this blog post!
If you liked this article, you might also like other articles I wrote on screenshot testing:
- Design a pixel perfect Android app 🎨
- UI tests vs. snapshot tests on Android: which one should I write? 🤔
- An introduction to snapshot testing on Android in 2021
or unit testing...
or other topics...
If you are interested in the content I publish, follow me on Twitter!
Cover image by lucas Favre on Unsplash