Efficient Testing with Robolectric & Roborazzi Across Many UI States, Devices and Configurations
Robolectric is a popular UI testing tool from Google that enables running UI tests without a physical device or emulator.
It supports most androidx.test APIs, like Espresso, ActivityScenario & FragmentScenario as well as ComposeTestRule.
Robolectric recently added support for screenshot testing through "Robolectric Native Graphics" (RNG), and libraries like Roborazzi 1 help introduce screenshot testing with Robolectric to your software process with ease.
Using screenshot testing is highly advantageous when automating tests across diverse devices and configurations (i.e. locales, font sizes, dark/light mode, etc.). However, doing that efficiently is not straightforward with Robolectric.
Since Roborazzi tests are "Robolectric screenshot tests" and both are configured in the same way, I will use the term "Robolectric test" interchangeably.
In this blog post, we'll see how we can do it step by step. For that, we'll take the following Robolectric test as a starting point
@RunWith(RobolectricTestRunner::class)
class CoffeeDrinkListScreenshotTest {

    @GraphicsMode(GraphicsMode.Mode.NATIVE)
    @Config(qualifiers = RobolectricDeviceQualifiers.Pixel4a)
    @Test
    fun snapComposable() {
        captureRoboImage(filePath = "CoffeeDrink_AMERICANO.png") {
            AppTheme {
                CoffeeDrinkListItem(drink = americanoDrink)
            }
        }
    }
}

Parameterized Robolectric tests
To write our test across many UI states, devices and/or configurations, we could keep a single test and pass these variables as input data to it, in the form of a Parameterized test 1.
For that, you need to use Robolectric's ParameterizedRobolectricTestRunner, which we'll use in all the examples below
1 Definition of parameterized or data-driven testing
Testing across many UI States only
To test across a set of UI states in Parameterized tests, I strongly recommend using enums. For instance
enum class CoffeeDrinkType(
    val drink: CoffeeDrinkUiState, // e.g. Title and Subtitle
) {
    AMERICANO(americanoUiState),
    ESPRESSO(espressoUiState)
}
That's because Enums come with the following out of the box:
Enum.name: This uniquely identifies the screenshot file for that UI state
Enum.values(): Use it to provide UI states you'll pass as parameters to the Test class
The corresponding Parameterized test would look like this
// 1. Use the ParameterizedTestRunner
@RunWith(ParameterizedRobolectricTestRunner::class)
class CoffeeDrinkListScreenshotTest(
    val coffeeDrinkType: CoffeeDrinkType
) {

    // 2. Define parameters to pass to the constructor
    companion object {
        @JvmStatic
        @ParameterizedRobolectricTestRunner.Parameters
        fun coffeeDrinksProvider(): Array<CoffeeDrinkType> =
            CoffeeDrinkType.values()
    }

    @GraphicsMode(GraphicsMode.Mode.NATIVE)
    @Config(qualifiers = RobolectricDeviceQualifiers.Pixel4a)
    @Test
    fun snapComposable() {
        // 3. Use the coffeeDrink.name to avoid file overriding
        captureRoboImage(
            filePath = "CoffeeDrink_${coffeeDrinkType.name}.png"
        ) {
        // 4. Set Composable's UI State
            AppTheme {
                CoffeeDrinkListItem(
                    drink = coffeeDrinkType.drink
                )
            }
        }
    }
}
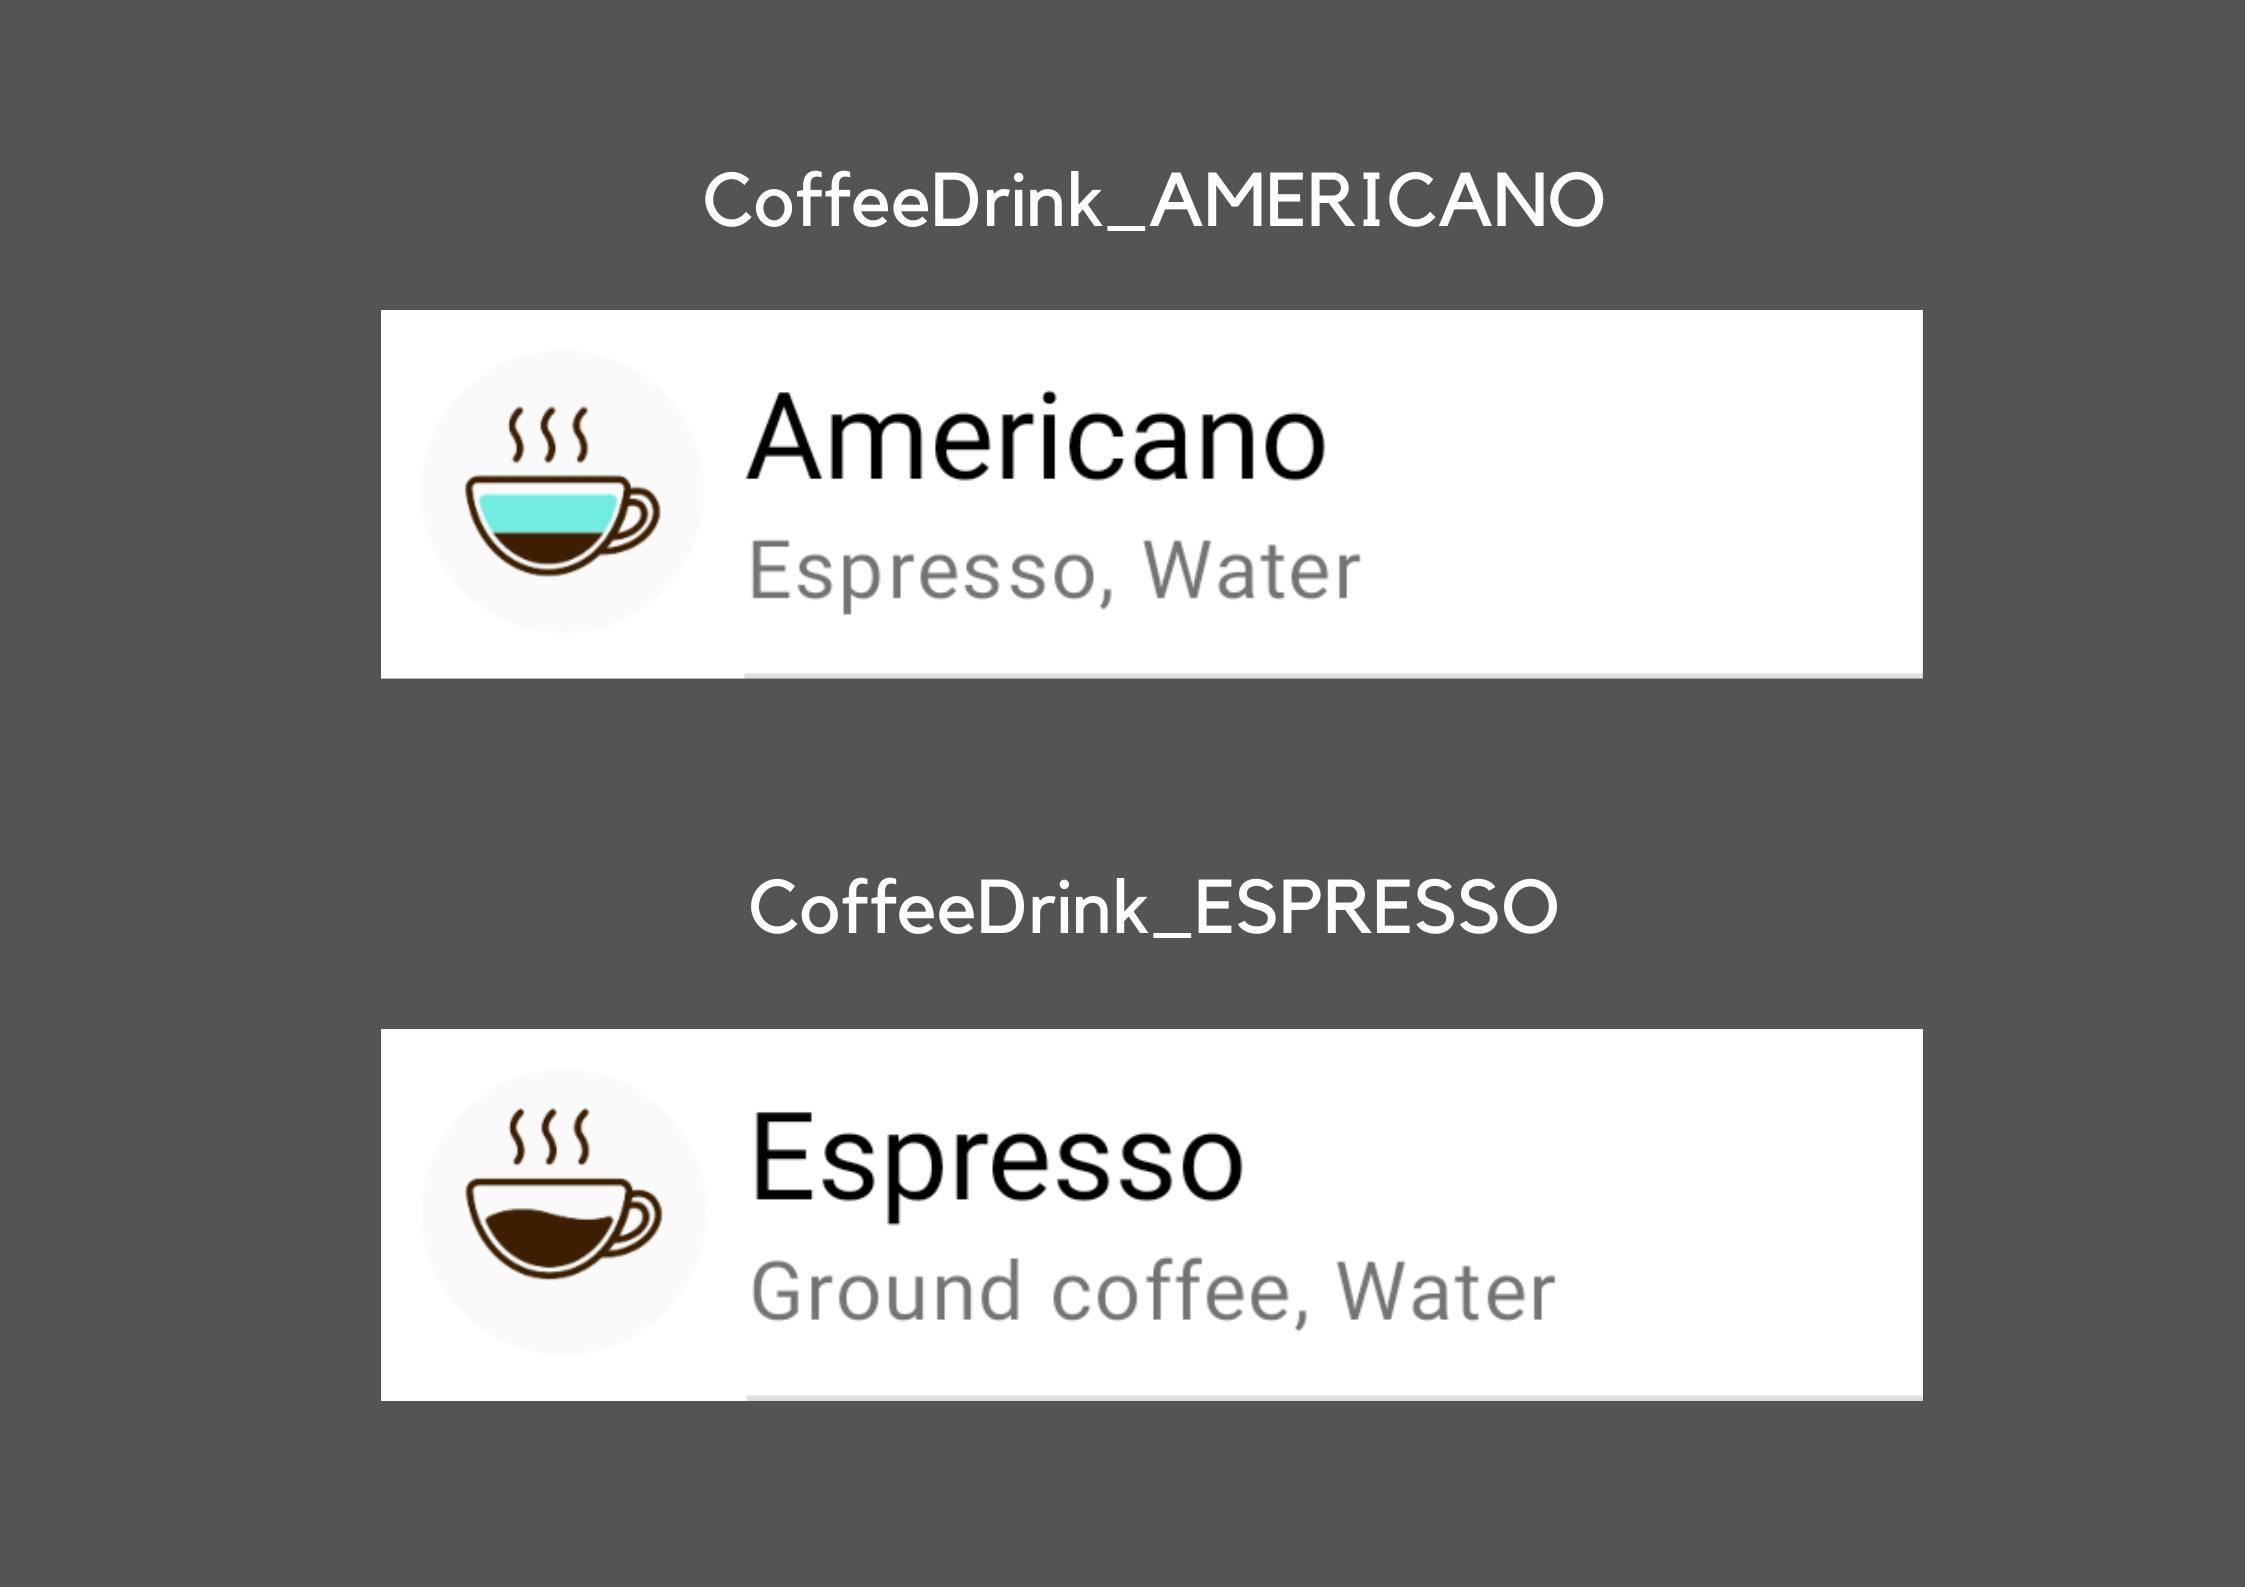
which generates the following screenshots

Testing across many Devices only
Robolectric devices can be configured using device qualifiers1, which are strings representing android.content.res.Configuration properties separated by dashes. For example:"w393dp-h851dp-normal-long-notround-any-440dpi-keyshidden-nonav"
Additionally, Roborazzi provides predefined RobolectricDeviceQualifiers for popular devices, such asval Pixel4a = "w393dp-h851dp-normal-long-notround-any-440dpi-keyshidden-nonav"
Robolectric offers several ways to set these qualifiers, providing flexibility in configuration
Statically: This is via annotation, for instance
@Config(qualifiers = RobolectricDeviceQualifiers.Pixel4a)
Nevertheless, annotations require compile-time arguments so they cannot be used in Parameterized testsDynamically: This is by using Robolectric's
RuntimeEnvironment.setQualifiers()
Therefore, we need to resort to the dynamic approach.
So a Parameterized Robolectric test across diverse devices could look like this
// 1. Use the ParameterizedTestRunner
@RunWith(ParameterizedRobolectricTestRunner::class)
class CoffeeDrinkListScreenshotTest(
    val deviceQualifier: String
) {

    // 2. Define devices that we'll pass to the constructor
    companion object {
        @JvmStatic
        @ParameterizedRobolectricTestRunner.Parameters
        fun deviceQualifiersProvider(): Array<String> =
            arrayOf(
                RobolectricDeviceQualifiers.Pixel4a,
                RobolectricDeviceQualifiers.MediumTablet,
            )
    }

    @GraphicsMode(GraphicsMode.Mode.NATIVE)
    @Test
    fun snapComposable() {
        // 3. Set device qualifier dynamically before screenshot
        RuntimeEnvironment.setQualifiers(deviceQualifier)

        // 4. Use the device qualifier to avoid file overriding
        captureRoboImage(
            filePath = "CoffeeDrink_${deviceQualifier}.png"
        ) {
            AppTheme {
                CoffeeDrinkListItem(
                    drink = americanoUiState
                )
            }
        }
    }
}
which generates

1 Robolectric documentation on "Device configuration"
Testing across many Configurations only
Let's first have a look at some of the Configurations we might want to verify with our Parameterized tests, and how to set them with Robolectric :
Locale, UI Mode & Orientation
These settings can also be configured using Robolectric's device qualifiers.
So these qualifiers define device specifications (width, height, density, etc.) together with user configurations (locale, UI mode, orientation, etc.) and their order also matters, throwing an exception if it is incorrect. Look at the example below:
| Device qualifier | Device specification | User Configuration |
| ar-w393dp-h851dp-port-night-440dpi | w393dp, h851dp, 440dpi | ar, port, night |
At first glance, it seems complicated to parameterize device specifications and user configurations separately. Fortunately, Robolectric provides cumulative qualifiers (i.e. device qualifiers prefixed with "+") which can be used to define user configurations on top of device specifications. For the example above, we can set these configurations dynamically by calling the following methods:
RuntimeEnvironment.setQualifiers("+ar")for Arabic, or for complex locales, like Latin script for Serbian, it'd be"+b+sr+Latn"RuntimeEnvironment.setQualifiers("+night")for dark mode or"+notnight"for light modeRuntimeEnvironment.setQualifiers("+port")or"+land"for landscape orientation, which switches the device's height and width.
We'll see it in practice lower down.
Font Size
It cannot be set via device qualifiers. Robolectric provides a method to set it dynamically insteadRuntimeEnvironment.setFontScale(1.3f)
or statically via annotation (which is not compatible with Parameterized tests)@Config(fontScale = 1.3f)
Display Size
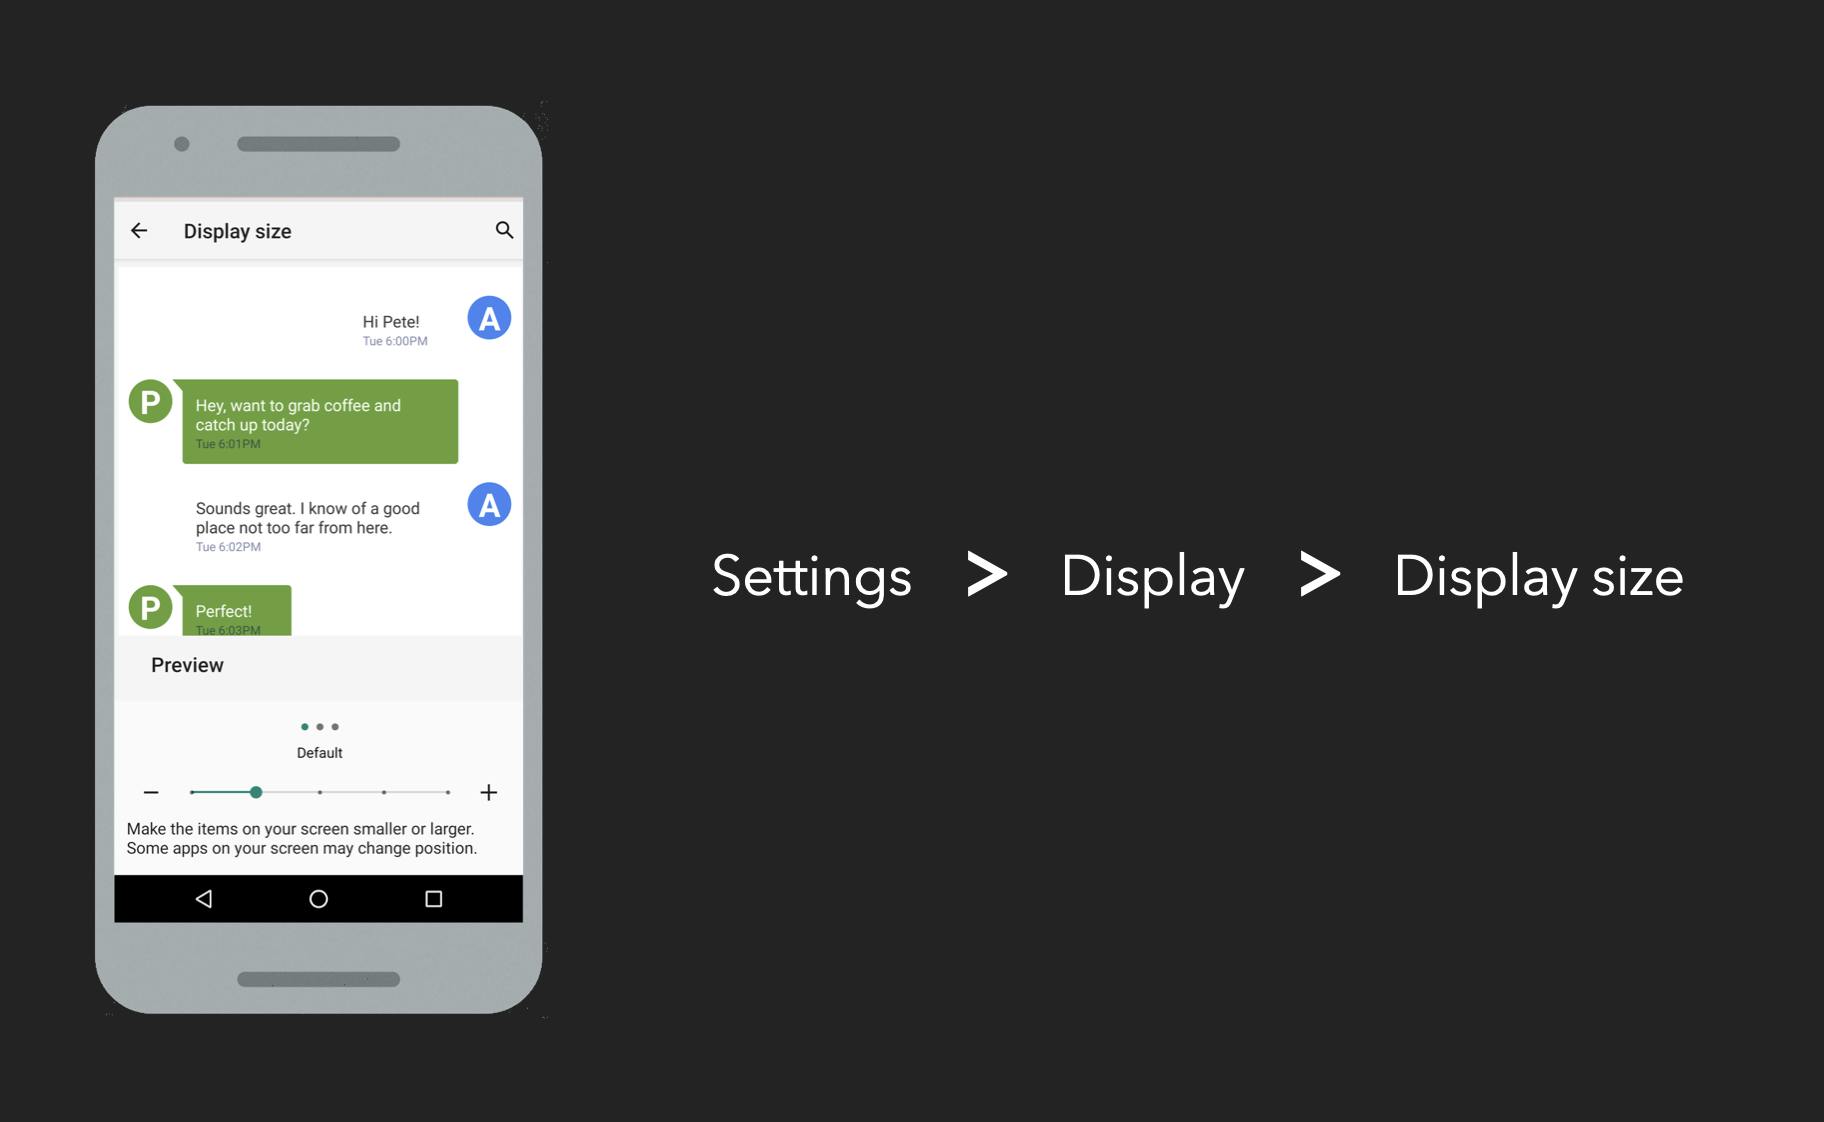
This is likely the most unknown. Users can change this option to increase/decrease the size of all UI elements of the screen, and not just the Font Size. This is thought for people with either farsightedness or thick thumbs.

For this config, Robolectric doesn't provide any method to specifically set it. Nevertheless, we can simulate it via updateConfiguration()
fun Context.setDisplayScale(displayScale: Float) = apply {
    val density = resources.configuration.densityDpi
    val config = Configuration(resources.configuration)
    config.densityDpi = (density * displayScale).toInt()

    resources.updateConfiguration(
        config,
        resources.displayMetrics
    )
}
And then call it on ApplicationContext, e.g.ApplicationProvider.getApplicationContext<Context>().setDisplayScale(1.3f)
Testing all configs together
First of all, Let's create a ConfigItem that groups all configuration variables and uniquely identifies them.
data class ConfigItem (
    val localeQualifier: String = "+en",
    val uiModeQualifier: String = "+notnight",
    val orientationQualifier: String = "+port",
    val fontScale: Float = 1.0f,
    val displayScale: Float = 1.0f,
    val screenshotId: String, // uniquely identifies this config
)
Then we can pass ConfigItems as parameters to the TestClass via @ParameterizedRobolectricTestRunner.Parameters
// 1. Use the ParameterizedTestRunner
@RunWith(ParameterizedRobolectricTestRunner::class)
class CoffeeDrinkListScreenshotTest(
    val config: ConfigItem
) {
    // 2. Define parameters to pass to the constructor
    companion object {
        @JvmStatic
        @ParameterizedRobolectricTestRunner.Parameters
        fun configItemProvider(): Array<ConfigItem> =
            arrayOf(
                ConfigItem(
                    fontScale = 0.75f,
                    screenshotId = "FONT_SMALL"
                ),
                ConfigItem(
                    localeQualifier = "+ar",
                    uiModeQualifier = "+night",
                    orientationQualifier = "+port",
                    displayScale = 1.3f,
                    screenshotId =
                        "AR_NIGHT_PORTRAIT_DISPLAY_LARGEST",
                ),
            )
    }

    @GraphicsMode(GraphicsMode.Mode.NATIVE)
    @Config(qualifiers = RobolectricDeviceQualifiers.Pixel4a)
    @Test
    fun snapComposable() {
        // 3. Set config dynamically before the screenshot
        //    These are applied on top of the @Config(qualifiers)
        RuntimeEnvironment.setQualifiers(config.localeQualifier)
        RuntimeEnvironment.setQualifiers(config.uiModeQualifier)
        RuntimeEnvironment.setQualifiers(config.orientationQualifier)
        RuntimeEnvironment.setFontScale(config.fontScale)
        ApplicationProvider.getApplicationContext<Context>()
                           .setDisplayScale(config.displaySize)

        // 4. Use configItem's screenshotId to avoid file overriding
        captureRoboImage(
            filePath = "CoffeeDrink_${config.screenshotId}.png"
        ) {
            AppTheme {
                CoffeeDrinkListItem(
                    drink = americanoUiState
                )
            }
        }
    }
}

Testing across many UI States, Devices and Configurations together
Once we know how to write a single test under diverse UI states, devices and configurations separately, it's time to test combinations of them 3 together.
Analogue to the previous section, we create a TestItem which groups all 3 variables, while providing a unique identifier for each combination
data class TestItem (
    val coffeeDrink: CoffeeDrinkType, // UI State
    val deviceQualifier: String, // Device
    val configItem: ConfigItem, // Config
){
    // Unique id for an UI state, device & config combination
    // Use it to create unique screenshot file names
    val screenshotId: String =
        listOf(
            coffeeDrink.name,
            configItem.screenshotId,
            deviceQualifier,
        ).joinToString("_")
}
Generating all possible combinations
A common scenario is to test all possible combinations of a given set of UI states, devices & configurations. This is affordable for small sets, but doing that manually is error-prone and doesn't scale well:
| UI States | Configurations | Devices | All Combinations |
| 2 | 2 | 2 | 2x2x2 = 8 |
| 2 | 2 | 3 | 2x2x3 = 12 |
| 2 | 3 | 3 | 2x3x3 = 18 |
We can automatize this effectively by generating all combinations with their Cartesian product1
// WARNING:
// None of the sets should be empty to return some value
fun combineAll(
    coffeeDrinks: Set<CoffeeDrink>,
    deviceQualifiers: Set<String>,
    configItems: Set<ConfigItem>,
): Array<TestItem> {
    val combinations: MutableList<TestItem> = mutableListOf()
    for (coffeeDrink in coffeeDrinks){
        for (deviceQualifier in deviceQualifiers) {
            for (configItem in configItems) {
                combinations.add(
                    TestItem(
                        coffeeDrink,
                        deviceQualifier,
                        configItem,
                    )
                )
            }
        }
    }
    return combinations.toTypedArray()
}
1 Definition of Cartesian product
An In-Depth Parameterized Robolectric test
With all that in place, our Parameterized Robolectric test for all combinations of the given parameters would look like this
// 1. Use the ParameterizedTestRunner
@RunWith(ParameterizedRobolectricTestRunner::class)
class CoffeeDrinkListScreenshotTest(
    val testItem: TestItem
) {
    // 2. Define parameters to pass to the constructor
    companion object {
        @JvmStatic
        @ParameterizedRobolectricTestRunner.Parameters
        fun testItemProvider(): Array<TestItem> =
            combineAll(
                CoffeeType.values().toSet(),
                setOf(
                    RobolectricDeviceQualifiers.Pixel4a,
                    RobolectricDeviceQualifiers.MediumTablet,
                ),
                setOf(
                    ConfigItem(
                        fontScale = 0.75f,
                        screenshotId = "FONT_SMALL"
                    ),
                    ConfigItem(
                        localeQualifier = "+ar",
                        uiModeQualifier = "+night",
                        orientationQualifier = "+port",
                        displayScale = 1.3f,
                        screenshotId =
                            "AR_NIGHT_PORTRAIT_DISPLAY_LARGEST",
                    ),
                )
            )
    }

    @GraphicsMode(GraphicsMode.Mode.NATIVE)
    @Test
    fun snapComposable() {
        // 3. Set device qualifier dynamically
        RuntimeEnvironment.setQualifiers(testItem.deviceQualifier)

        // 4. Set config dynamically with cumulative qualifiers
        //    to apply them on top of the device qualifier
        val config = testItem.configItem
        RuntimeEnvironment.setQualifiers(config.localeQualifier)
        RuntimeEnvironment.setQualifiers(config.uiModeQualifier)
        RuntimeEnvironment.setQualifiers(config.orientationQualifier)
        RuntimeEnvironment.setFontScale(config.fontScale)
        ApplicationProvider.getApplicationContext<Context>()
                           .setDisplayScale(config.displaySize)

        // 5. Use the testItem.screenshotId
        //    to avoid file overriding
        captureRoboImage(
            filePath = "CoffeeDrink_${testItem.screenshotId}.png"
        ) {
        // 6. Set Composable's UI State
            AppTheme {
                CoffeeDrinkListItem(
                    drink = testItem.coffeeDrink.uiState
                )
            }
        }
    }
}
And that's it!
But the test looks a bit "unnatural", right? Can we do it better?
Enhancing In-Depth Parameterized Robolectric tests
Although the previous example works, we can identify some issues:
No type safety configurations: We set Locale, UI Mode and Orientation with Strings in the form of cumulative qualifiers, which is error-prone.
Readability: So many
setQualifiers()makes it hard to see what is being tested.Qualifier limitations: You cannot use qualifiers to set custom XML themes (in "old" Android Views) or pseudolocales 1 (i.e. en_XA & ar_XB) for pragmatic localized UI testing.
Solving 1. and 2. on our own isn't hard, but 3. is rather complicated.
Fortunately, AndroidUiTestingUtils 2 solves the 3 of them elegantly for you. Additionally, it comes with TestDataCombinators for Composables, Views, Activities and Fragments that:
Automatically generate all possible combinations of a given set of UI states, devices and configurations for the UI element under test.
Return
TestDatawith a screenshotId to uniquely identify each combination, that we can use in the screenshot file name.
By using AndroidUiTestingUtils 2, the very same test above looks like this
    testImplementation 'com.github.sergio-sastre.AndroidUiTestingUtils:utils:2.0.1'
    testImplementation 'com.github.sergio-sastre.AndroidUiTestingUtils:robolectric:2.0.1'
    // Add this to use 'robolectricActivityScenarioRule.captureRoboImage'
    testImplementation 'com.github.sergio-sastre.AndroidUiTestingUtils:roborazzi:2.0.1'
// 1. Use the ParameterizedTestRunner
@RunWith(ParameterizedRobolectricTestRunner::class)
class CoffeeDrinkListScreenshotTest(
    //  TestDataForComposable is from AndroidUiTestingUtils
    val testItem: TestDataForComposable<CoffeeType>
) {
    // 2. Define parameters to pass to the constructor
    companion object {
        @JvmStatic
        @ParameterizedRobolectricTestRunner.Parameters
        fun testItemProvider(): TestDataForComposable<CoffeeType> =
            TestDataForComposableCombinator(
                uiStates = CoffeeType.values()
            )
             .forDevices(
                 DeviceScreen.Phone.PIXEL_4A,
                 DeviceScren.Tablet.MEDIUM_TABLET,
             )
             .forConfigs(
                 ComposableConfigItem(
                     fontSize = FontSize.SMALL,
                 ),
                 ComposableConfigItem(
                     locale = "ar",
                     orientation = Orientation.PORTRAIT,
                     uiMode = UiMode.NIGHT,
                     displaySize = DisplaySize.LARGEST,
                 ),
             )
             .combineAll()
        )
    }

    // 3. Apply device and config
    //    This Rule is from AndroidUiTestingUtils
    @get:Rule
    val activityScenarioRule =
        RobolectricActivityScenarioForComposableRule(
            config = testItem.config,
            deviceScreen = testItem.device,
        )

    @GraphicsMode(GraphicsMode.Mode.NATIVE)
    @Test
    fun snapComposable() {
        // 4. Use the testItem.screenshotId
        //    to avoid file overriding
        activityScenarioRule.captureRoboImage(
            filePath = "CoffeeDrink_${testItem.screenshotId}.png"
        ) {
        // 5. Set Composable's UI State
            AppTheme {
                CoffeeDrinkListItem(
                    drink = testItem.uiState.drink
                )
            }
        }
    }
}
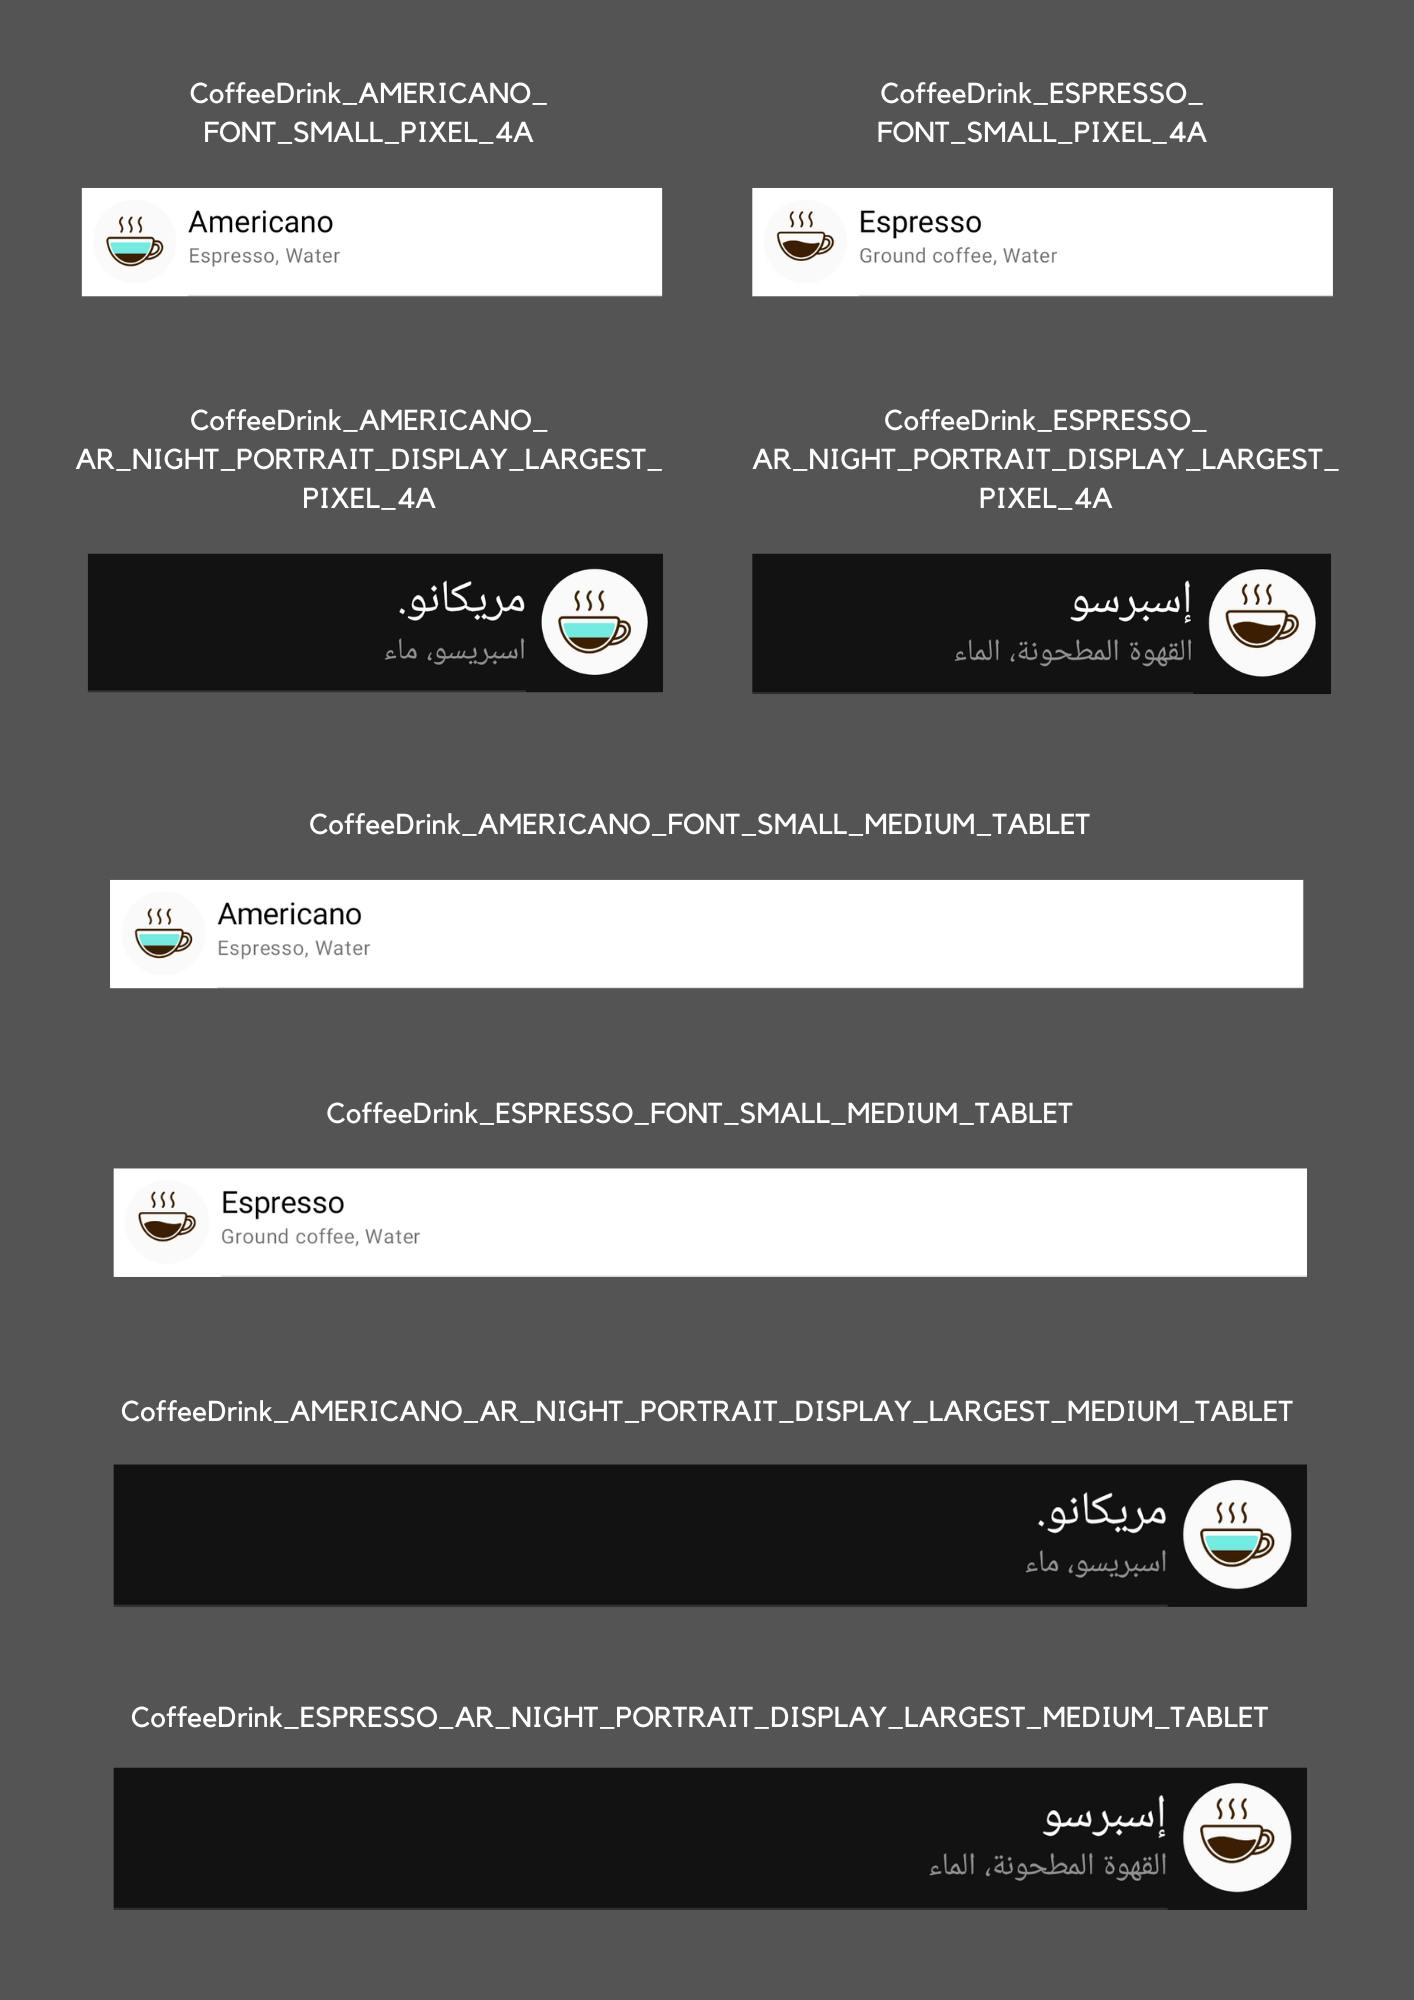
and creates one screenshot for each resulting TestDataForComposable<CoffeeType>

Similar examples for both, Composables and Android Views can be found in the Android Screenshot Testing Playground 3 repo. Moreover, AndroidUiTestingUtils 2 supports Activities and Fragments as well.
1 Test your app with Pseudolocales (Android official documentation)
2 AndroidUiTestingUtils library
3 Android screenshot testing playground repo
Conclusions
Robolectric supports UI testing across diverse devices and configurations, mainly via device qualifiers. Nevertheless, it is not intuitive how to do it efficiently because:
font scale and display size cannot be set using device qualifiers but by other means, which makes it inconsistent and unintuitive.
device specifications and user configurations are mixed up within the same device qualifier, which difficulties its parameterization.
After showing how to set up your Robolectric & Roborazzi tests to run across diverse UI states, devices and configurations, we've finally introduced AndroidUiTestingUtils 2.0.1. to additionally support pseudolocales and xml custom themes as well as to provide type-safety and improve the readability of your Robolectric & Roborazzi tests.
Further resources
📱Robolectric documentation on "Device configuration"
📸 AndroidUiTestingUtils - A companion library with utilities to facilitate screenshot testing, compatible with most libraries.
🛝 Android screenshot testing playground - Screenshot test examples for Composables, Android Views, Fragments and Activities with different libraries. It also contains examples of Parameterized Roborazzi tests across multiple devices and configurations for:
✍️ Blog post series: The road to effective snapshot testing - Several articles to introduce screenshot testing and its benefits, as well as solutions to problems you might come across.
Special thanks to Pablo Gallego for reviewing this blog post!
If you are interested in the content I publish, follow me on Twitter or LinkedIn!
