

A World Beyond Libraries: Cross-Library screenshot tests on Android
An Introduction to the Concept


Photo by Jakob Owens on Unsplash
The state of the art of screenshot testing for Android
Screenshot testing is trending in Android. Many new libraries have come up, and even Google announced at I/O 20231 that they're working on a new tool for this based on Composable Previews powered by Layoutlib.
But every single library has its pros and cons.
For example, Paparazzi and Roborazzi let us do screenshot tests without needing emulators or real devices.
This makes tests run faster and therefore, get feedback quicker.
Although they also have their limitations...
Paparazzi is based on Layoutlib. This means you might find some issues like:
Screenshots might not look the same as on devices, for instance
If multiple animations are involved

Shot, Dropshots and Roborazzi render as on-device 2
If rendering Composables inside Launch effects (due to LayoutLib)
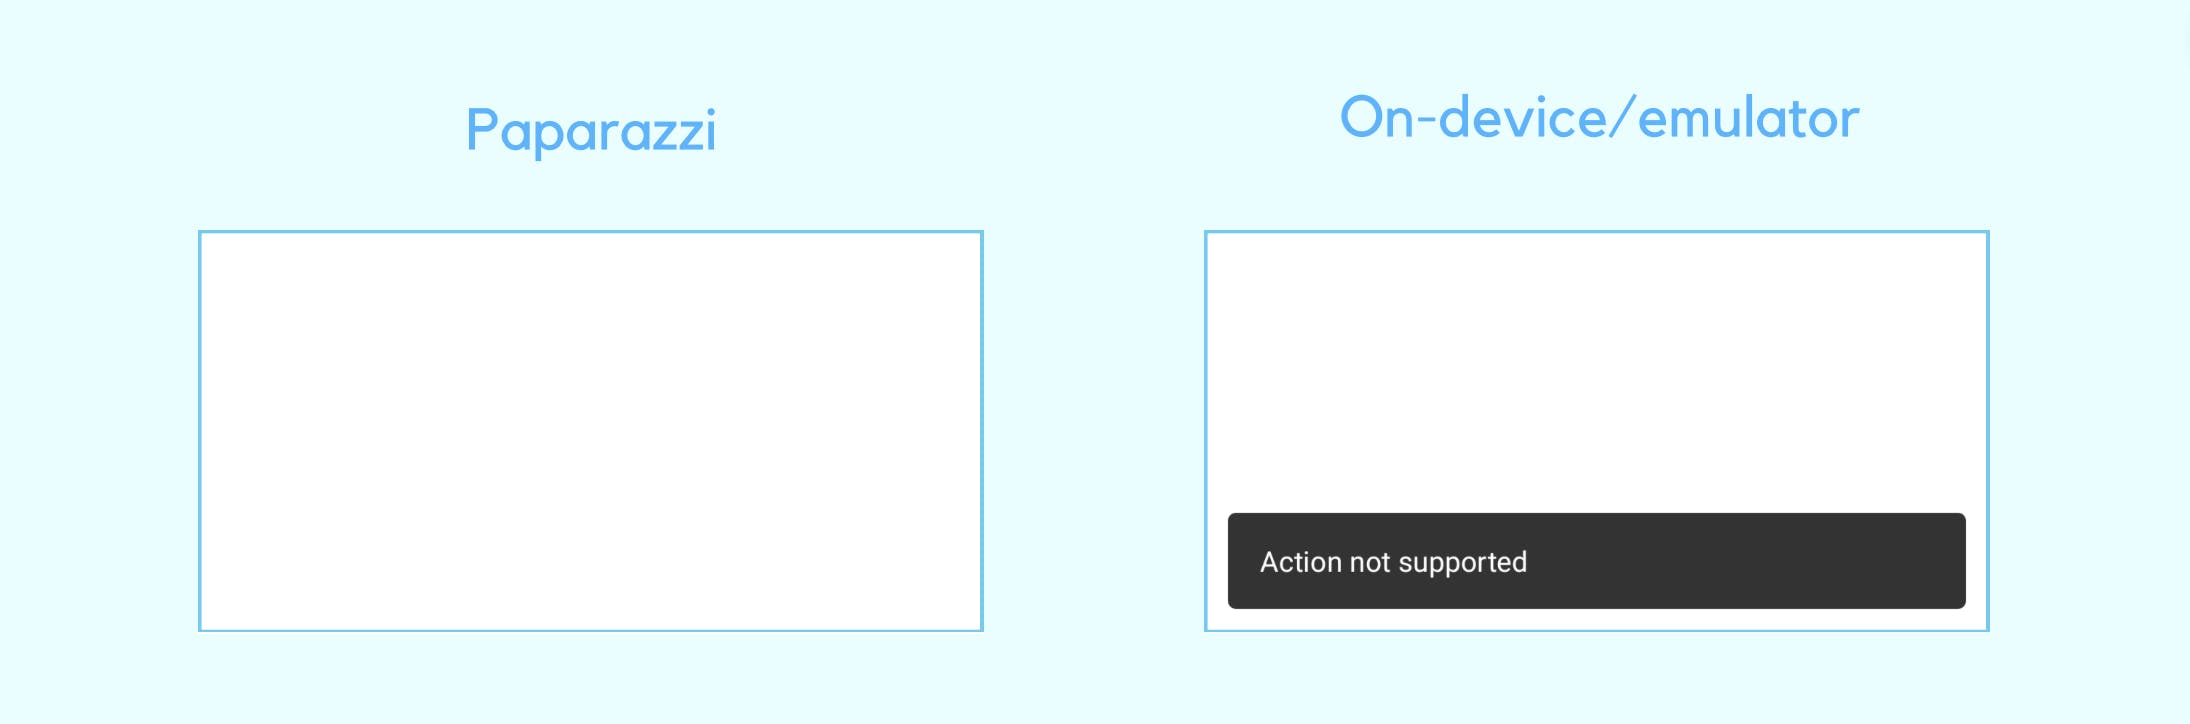
Shot, Dropshots and Roborazzi render as on-device 2
Sensitivity to Android Gradle Plugin (AGP) changes. If you update AGP blindly, Paparazzi tests might fail.
Roborazzi is based on Robolectric Native Graphics (RNG from now on), which also has its own issues:
Tests may fail on Windows 3
Shadows are not shown in screenshots 4
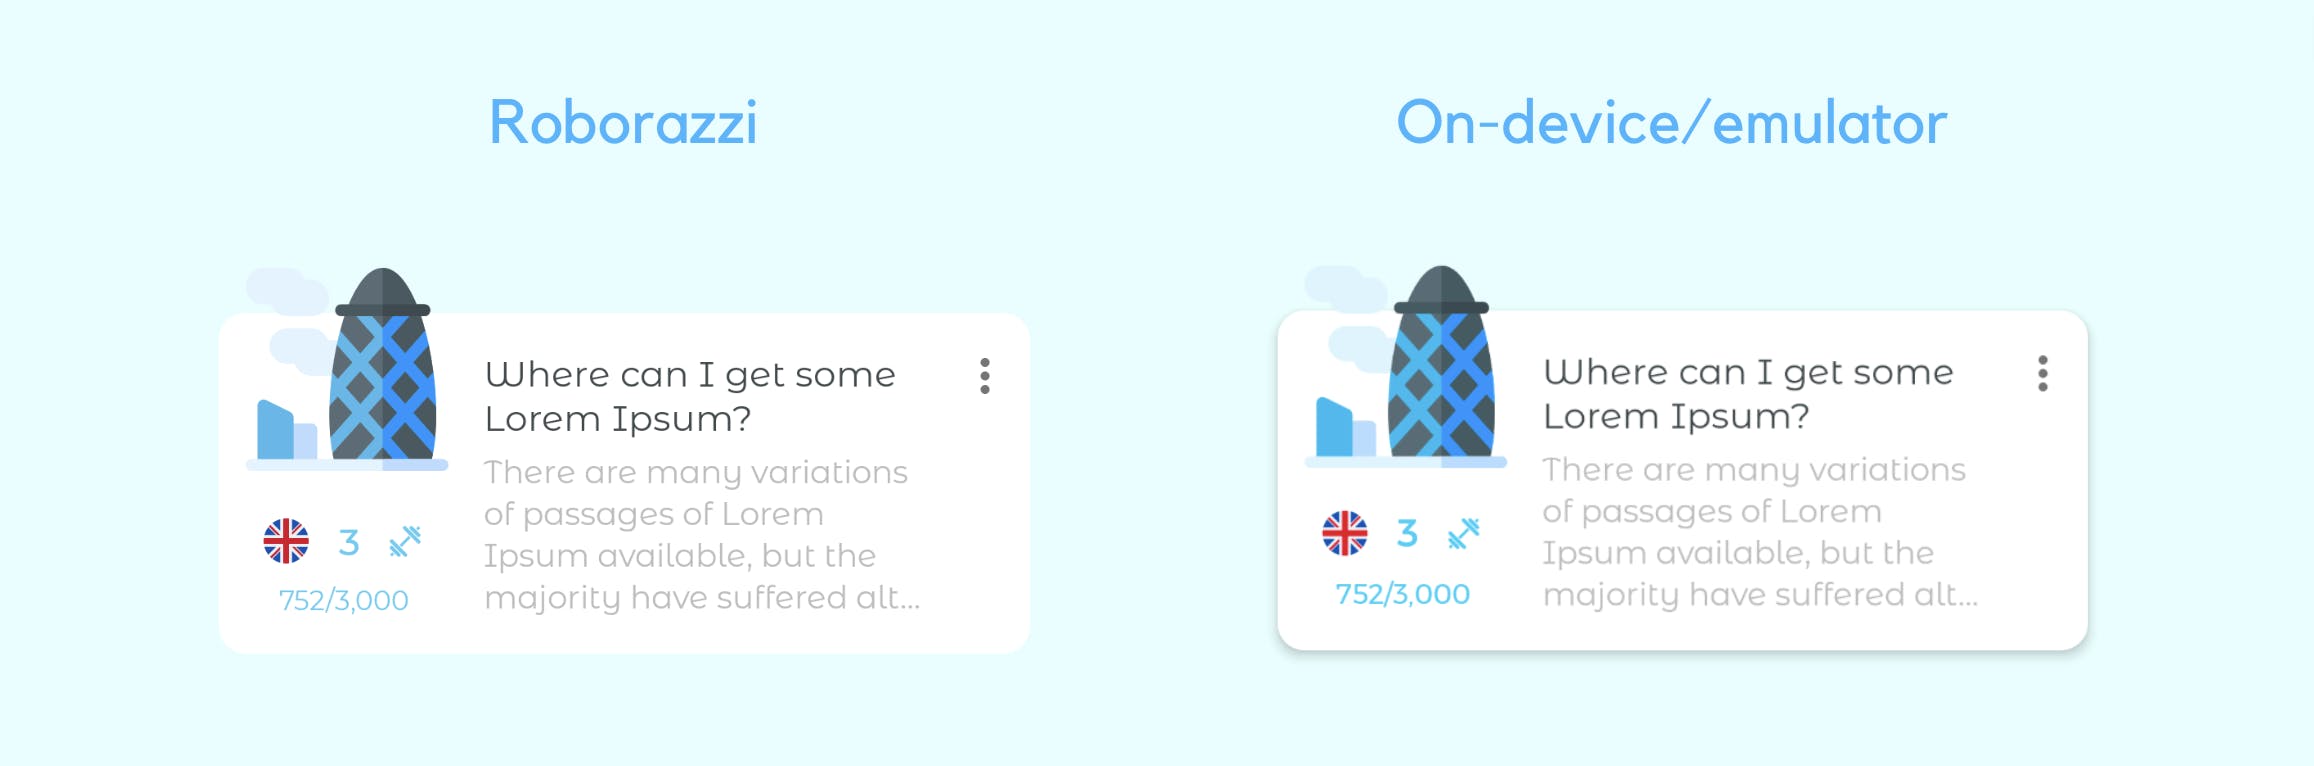
Shot, Dropshots and Paparazzi render as on-device 2
Shot, Dropshots and other on-device screenshot testing libraries don't suffer from such rendering issues

Pros
- High fidelity - the screenshots show accurately what users see
Cons
Dealing with emulators is problematic and might cause flakiness
Potential risks of emulators freezing or crashing
Susceptibility to errors like "insufficient disk space"
Slower - you need to wait for them to be ready before running the tests
Furthermore, each JVM and on-device screenshot testing library boasts distinct features that set them apart from one another.
1 Video on "host-side screenshot tests" presented at Google/IO 2023.
2 Android screenshot testing playground contains test examples you can execute to check it out
3 RNG issues on Windows
4 RNG doesn't display shadows
Choosing the right library
On one hand, if you're new to screenshot testing, you could waste time finding the right library for your project's needs. It'd be frustrating to realize later that the library you've chosen has relevant limitations/bugs after writing hundreds of tests.
On the other hand, if you've got some experience with screenshot testing, the odds are very high that you've already migrated from one library to another because of issues/bugs/missing features in the library or its slow test execution.
Rewriting the same screenshot tests to run with another library takes a while, especially if you have hundreds or thousands of them. Imagine yourself rewriting every single test.
And here's another thing: even after you switch libraries, you might run into new problems and think about switching again or even using more than one library. For example, you might decide to run JVM screenshot tests locally for fast feedback but use an on-device library for solid regression testing on CI.
So, what if we could write screenshot tests once and run them with any library of our choice, without rewriting them? That'd solve both problems.
And that's what cross-library screenshot testing is about!
For simplicity, we'll focus on screenshot tests for Composables in this blog post series.
Understanding the structure of a screenshot test
If we have a look at screenshot tests written with the most popular libraries, they all follow a similar structure:
Set the device configuration (e.g. Locale, Ui Mode, Font scale...)
Set the Subject Under Test (SUT): calling the composable
Record/Verify the screenshot of the SUT.
Let's see how this applies to the same screenshot test when written with different libraries, e.g. Dropshots, Paparazzi and Roborazzi. We'll skip Shot for simplicity.
Dropshots
class DropshotsScreenshotTest {
   // 1. Configuration setter
   // Rule from AndroidUiTestingUtils
   @get:Rule
   val rule = ActivityScenarioForComposableRule(
        config = ComposableConfig(
            locale = "es",
            fontScale = FontSize.HUGE,
            ...
        )
   )

   @get:Rule
   val dropshots = Dropshots()

   @Test
   fun snapComposable() {
   // 2. Set the Subject Under Test
      rule.setContent {
          AppTheme { MyComposable() }
      }
   // 3. Record/verify snapshot
      dropshots.assertScreenshot(
          view = rule.composeView,
          name = "myComposable"
      )
   }
}
Paparazzi
class PaparazziScreenshotTest {
   // 1. Configuration setter
   @get:Rule
   val rule = Paparazzi(
        deviceConfig = PIXEL_5.copy(
            locale = "es",
            fontScale = 1.3f,
            ...
        )
   )

   @Test
   fun snapComposable() {
   // 3. Record/verify the snapshot
      rule.snapshot(name = "myComposable") {
   // 2. Set the Subject Under Test
          AppTheme { MyComposable() }
      }
   }
}
Roborazzi
@RunWith(RobolectricTestRunner::class)
class RoborazziScreenshotTest {
   // 1. Configuration setter
   // Rule from AndroidUiTestingUtils
   @get:Rule
   val rule =
       RobolectricActivityScenarioForComposableRule(
           config = ComposableConfig(
               locale = "es",
               fontScale = FontSize.HUGE,
               ...
        )
   )

   @GraphicsMode(NATIVE)
   @Test
   fun snapComposable() {
   // 2. Set the Subject Under Test
      rule.setContent {
          AppTheme { MyComposable() }
      }
   // 3. Record/verify snapshot
      activityScenarioForComposableRule
            .composeRule
            .onRoot()
            .captureRoboImage(
                filePath("myComposable")
            )
   }
}
It's worth mentioning that Roborazzi tests have 2 particularities: @RunWith(RobolectricTestRunner::class) and @GraphicsMode(NATIVE)
We'll discuss them in the next blog post of this series.
Conclusions
We've seen the differences in how each library configures and handles snapshots, though they all use a TestRule in some way.
With all these learnings, it seems feasible to get cross-library screenshot tests working:
Define a common interface to setup device configuration & the SUT, as well as to Record/verify snapshots
Implement that interface with each library you want to use.
Create a component that selects the library that executes the tests under the hood.
After that, you should be able to run these tests with any of these libraries by executing the corresponding record/verify command.
However, the road to cross-library screenshot testing is bumpier than it seems.
In the next blog post of this series, I discuss the challenges associated with it and show how AndroidUiTestingUtils tackles these obstacles to facilitate cross-library screenshot testing. Read it now here:
📸 Write Once, Test Everywhere: Cross-Library Screenshot Testing with AndroidUiTestingUtils 2.0.0
Further resources
👨🏫 Mastering Screenshot Testing Libraries for Android: A Hands-on Workshop(Droidcon Berlin 2023) - Workshop analysing pros and cons of many libraries
📸 AndroidUiTestingUtils - A library with utilities to fully support Cross-Library screenshot testing.
🛝 Android screenshot testing playground - Screenshot test examples with different libraries, as well as Cross-library screenshot tests for Compose and Android Views.
✍️ Blog post series: The road to effective snapshot testing - Several articles to introduce screenshot testing and its benefits, as well as solutions to problems you might come across.
Special thanks to Pablo Gallego for reviewing this blog post!
If you are interested in the content I publish, follow me on Twitter or LinkedIn!